DIY Outdoor Lighting Tips for Beginners
Run Wire Under Walkways
If you need to run wiring under an existing walkway, try this trick: Dig a small trench on both sides. Next, flatten the end of a piece of rigid metal conduit and use a sledgehammer to drive the conduit, flattened end first, horizontally under the walkway. Then cut off the ends of the conduit with a hacksaw, file off the sharp edges and feed your wire through the conduit. A 10-ft. stick of rigid steel conduit (the thick, heavy-duty stuff) is inexpensive and available at home centers.
Buy the Right Transformer
A ‘low-voltage’ lighting system starts with a transformer plugged into a GFCI-protected receptacle. The transformer’s job is to convert 120-volt household current to 12 volts before sending it through special outdoor cable to light your fixtures. Just a few years ago, you would have needed a 600- to 1,200-watt transformer to light a yard full of halogen lamps. But because LEDs use fewer watts than their halogen predecessors, smaller transformers—45 to 300 watts—are usually all that’s needed.
You Can Keep Your Old Transformer
Any older low-voltage transformer can be used to power both halogen and LED lights—even if they’re mixed on the same circuit—as long as you have enough wattage to spare in your old transformer. If your transformer isn’t big enough to handle the additional load, add a second transformer or upsize your existing one.
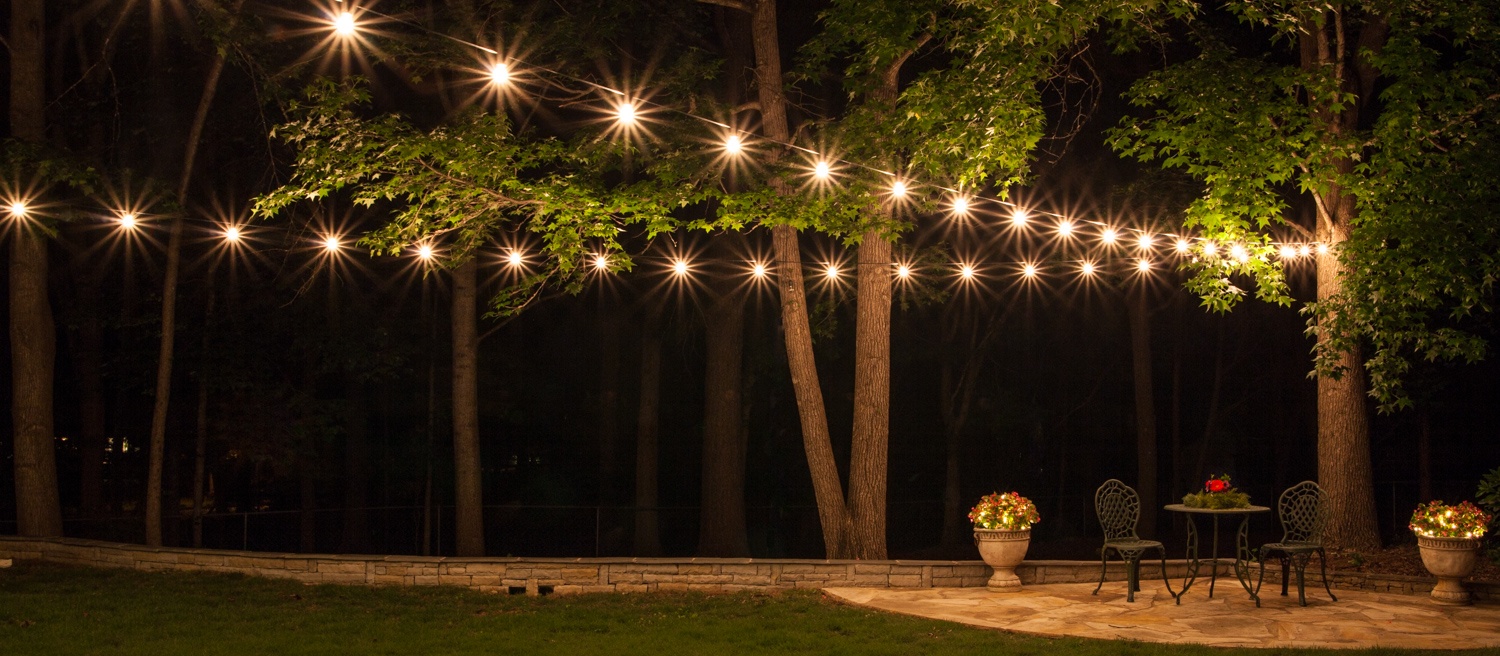
Experiment with Clamp Lights
Before you buy anything, make a sketch of your deck or patio on graph paper (or use a program like Sketch-Up) and plan the location for each of your new light fixtures. To get an idea of the effect a fixture will give, pick up a clamp light—the kind with a metal reflector shade—and a few different types of lightbulbs with different brightnesses. Then, when it starts to get dark, try out the clamp light using different bulbs in a few different spots so you can observe their effect. Mark the most desirable locations on your drawing, and pay particular attention to lighting areas like stairs and transitions to different levels for safety.
Skip the Quick Connectors
Some landscape lighting kits have preinstalled quick connectors, but they aren’t what the pros use. Cheap connectors buried underground will work for a while, but they can corrode over time and fail. Cut off the factory-installed connectors and make splice connections using gelfilled wire connectors made specifically for outdoor use.

Tips for Safe Outdoor Lighting
Attach Holiday Lights With Non-Metal Non-Binding Materials
Be careful when you’re attaching temporary lighting strings and ornaments. Don’t use something that might damage the wires, and avoid anything with metal in it. Metal conducts electricity. Plastic cable ties are one popular and inexpensive choice for this task.
Install a Cover for Wet Locations in the Open
If your outdoor receptacle isn’t under a roof or some other protective cover it needs to have a special cover, known as an “in-use” cover, over it. As the name implies, these covers will keep the receptacle and the plug that’s in it, dry — even in the rain.
Install a Cover for Damp Locations Under a Roof
If you have an outdoor receptacle that’s on your porch or your screened-in patio or in some other location that’s protected from direct protection, then you can cover it with a “trap door” cover that will close, and keep it protected, when nothing is plugged into it — and it’s OK, then, to plug something into that receptacle and leave it there for a few days. These covers will be marked “Suitable For Damp Locations.”
Install GFCI Protection
GFCI, or Ground Fault Circuit Interrupter, protection is one of the most important electrical safety improvements of the last forty years. GFCI outlets should be installed in kitchens, bathrooms, garages, and even attics, crawl spaces, and unfinished basements. It’s required anywhere you might be plugging something in while you’re grounded. And that certainly includes when you’re standing out in the yard.
Install Weather-Resistant Receptacles
You should always plug temporary outdoor loads into outdoor receptacles, rather than running a cord out through a doorway or window from one of the receptacles inside your house, and those receptacles need to be weather-resistant. Even though they’ll have special outdoor covers over them, the receptacles themselves need to be able to take dampness, freezing, and heat without being damaged. They need to be rated as weather-resistant.
Outdoor lighting: A beginner’s guide
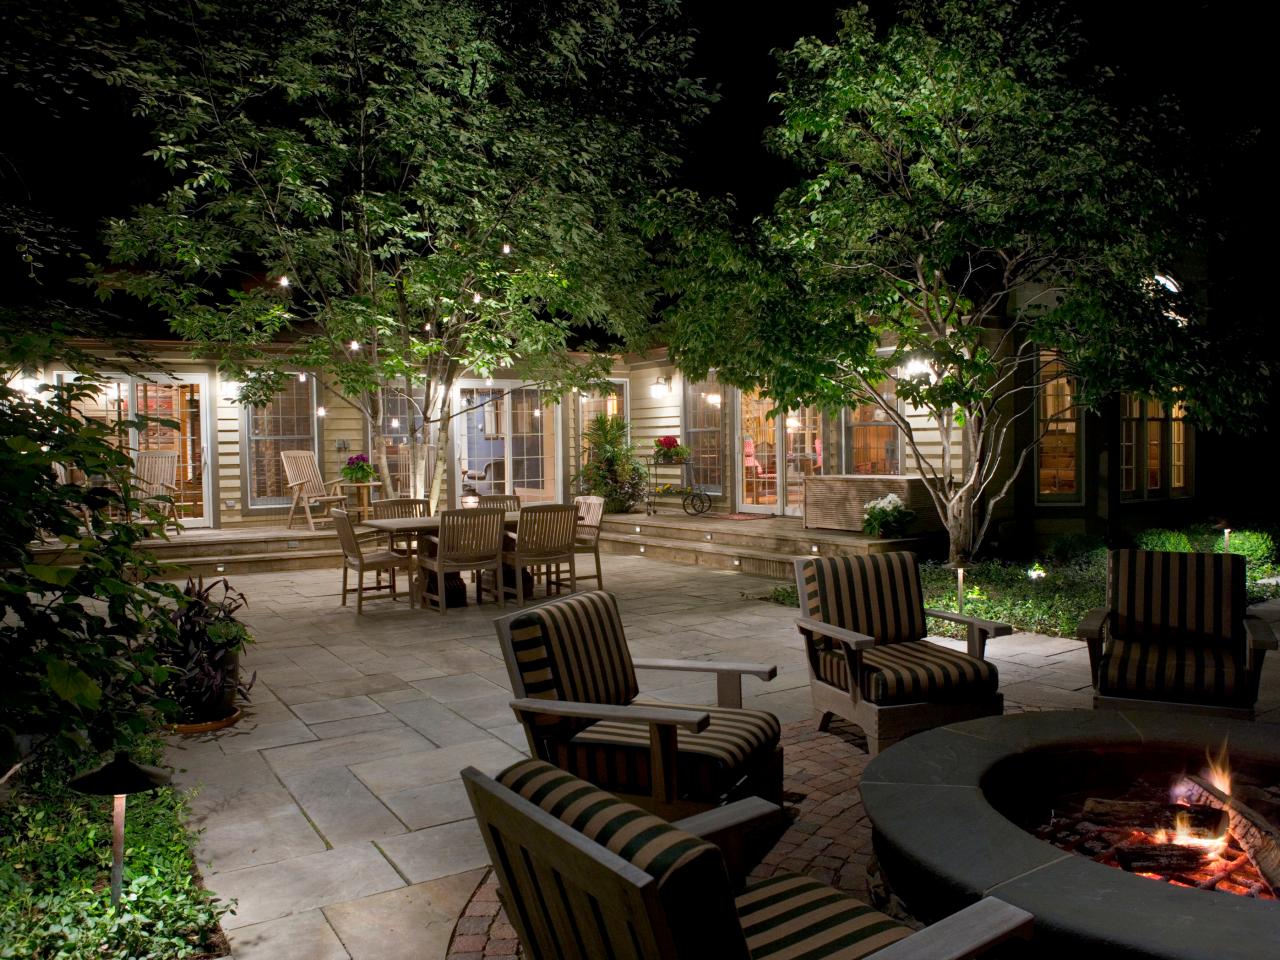
Start with task lighting
Once you’ve figured out your goals for outdoor lighting, task lighting should take priority. “For task lighting, it is important to illuminate pathways and entrances,” says Garcia.
“If your fixture is exposed to the elements, you will want to make sure to get a wet-rated fixture,” she says. “In many instances, a damp-rated light will work with a fully covered porch.”
Just make sure to stick to lighting that’s specifically identified as outdoor lighting—even if you are tempted by a cute indoor sconce.
Bright lights that wash a house or columns not only add drama, but also security, as outdoor lighting can be an enormous deterrent for would-be burglars, Wong explains.
There are loads of options that help boost security, from Wi-Fi-controlled LED light bulbs that can be controlled remotely to motion-sensor lights with distance and size controls.
It’s also important to bear in mind that lighting for security is all about location, primarily the front door, driveway, and garage. “If you are using spot lights/motion sensors, it’s best to position them in a location that does not bother you in the house or your neighbors,” Garcia says. “Install them during the day and adjust them at night to make sure they are not a burden on you or your neighbors.”
tips for effective outdoor lighting
- Transformers and outdoor circuits. Choosing a starting point for your circuit is an important consideration when creating your plan. The further away a light is from a transformer (and the more lights in between), the dimmer it will be. Don’t overload a circuit with lights, try to keep it to a maximum of 100 watts on each line. Your transformer should be more than adequate to match your needs. Talk to your electrican first, but it’s better to buy one with more output than you need so you can add more later.
- Less is more. Outdoor lighting is subtle art, used to illuminate paths, highlight trees and plants and for letting you know where a building is. It’s no use lighting up your backyard like a sports game. Use the right lights for the right job; there’s a different outdoor light for almost any feature you care to light up. Use underwater lights for ponds and fountains, small path lights for paths and tree-mounted spotlights (not too bright) for that hint of moonlight.
- Be safe and aesthetically pleasing. Don’t simply run a lead from your lounge outside to a 4-way adapter and plug in four lamps. Outdoor lighting is designed just for that – outdoors. Electricity does not do well outdoors unless properly channelled, so make sure you’re wiring up your outdoor lighting by the book. Call on an electrician to help you out if need be.
- Energy saving. Outside lights may seem like an extra expense reserved for the luxurious among us, but the cost can be minimal. Investigate different types of lighting.Solar power is a great resource for outdoor lighting. There are many cheap outdoor lamps with their own solar panels that charge during the day. This will cost you nothing but the initial cost of purchase. Of course, they will need to be placed in a sunny place. LED outdoor lighting uses much less energy than traditional light bulbs, plus they are more hardy, needing fewer replacements. Think about the layout of your garden and what areas require light and where shadows will fall. Making a plan of your garden will let you know exactly what’s needed to get the best out of your garden after-hours. Of course, the best way to save money is by not leaving your lights on all the time. You will only need outdoor lighting on the odd occasion, so keep it special and leave them off most of the time.
- Long term considerations. Your outdoor lighting will need to handle all types of weather and seasons. When installing your lighting be sure you have a good idea of what changes your garden goes through, what plants will grow rapidly over the next few months, and what effect the lighting will have in each season. Your lighting becomes part of your garden, so treat it as such.
Must-Know Outdoor Lighting Tips
Include These Three Types.
Make sure to incorporate the three basic types of lighting: ambient, task, and accent. Ambient lighting can be achieved through hanging lights, post lights, and wall lights. Task lighting includes pathway lights, plus deck and security lights. And you can get accent outdoor lighting with landscape kits and spotlights. “For a small patio and a modest budget, consider string lights, solar spotlights, or LED candles,” Murphy says.
Calculate.
Before you start shopping, you’ll need to figure out exactly how much lighting you need. “To determine how much light a space requires, try this quick calculation: multiply the square footage of the area you want to light by 1.5 to get a rough estimate of the total wattage required,” he says. “For example, 100 square feet of space would require 150 watts.”
Plan Ahead When Choosing Fixtures.
Observe your space and take measurements so you don’t choose fixtures that are too large-scale. “Check the size and position of a fixture before you buy using a simple piece of paper,” Murphy says. “Use a paper template to determine exact placement to review the size before buying. For either the front porch or the back patio, the size of an outdoor wall light should be approximately one-third the height of the door.” You’ll also want to make sure you’re choosing sturdy lighting, one that’s made of high-quality and weather-resistant materials.
Use LEDs.
“They use far less energy than halogen or incandescent bulbs,” he says. “Plus, they are almost maintenance-free, so you won’t have to change bulbs.”
Take a Look From Inside Your Home.
This can help you decide on which lighting to choose and how place it around your yard. “Consider how patio spaces, gardens, and pathways look like from inside your home,” he says. “Lighting gardens or shrubbery that can be seen from living or dining rooms give a room-expanding view to the outside at night. Think path lighting for garden areas, or use solar outdoor lighting for a quick and easy style update.”