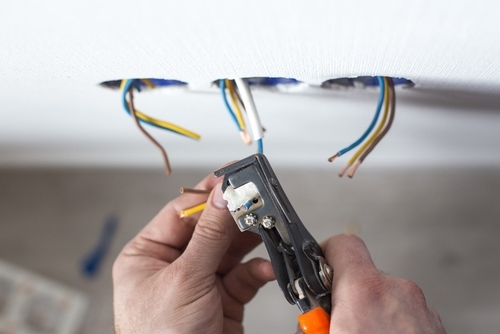
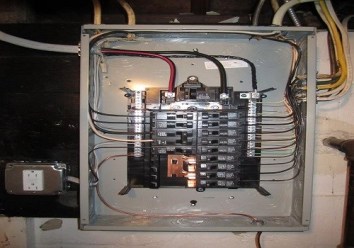
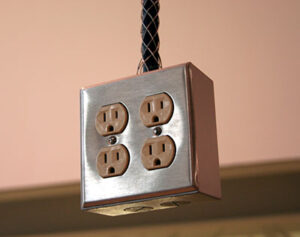
Shocking Revelation Concerning New Electric Circuits Safety

NEW CIRCUITS

An electrical circuit is a very important device in every home. It is the path through which electricity goes from a power source to an appliance and vice versa.

Are you a property owner planning to install a new electrical circuit in your home? If yes, then you have come to the right place. technicians take pride in knowing when it is necessary to add a new circuit and how to do the job in the cleanest and most efficient way.

As a property owner, it is advisable to always contact a professional company Electric to help you with your electrical needs.  Any residential property must have a solid electrical circuit and, thanks to the team of expert electricians, we have a reliable and efficient service. We will assist you in setting up your electrical circuits. We have a team of electrical professionals who understand the process of installing an electrical circuit. They will ensure that your system is installed safely and efficiently.

Apart from circuit installation and repair services, the experts Electric are proud to offer a wide range of electrical services and some of these include the following:

Residential Services

Commercial Services

Service Calls

New Circuits

Lighting installation

Electrical rewiring

Building Renovations

Electrical Testing Services

Electrical Repairs & Installations

Regular Electrical Maintenance

If you have a home improvement or upgrade project that requires electrical design, circuit installation or maintenance services, you will need the assistance of the experts. team of residential electricians are available to handle all home owner electrical problems.


ELECTRIC CIRCUIT STUDIO

Support for pause and resume simulations, ability to draw wires only by touching element’s pins and wires, placing elements by touching the desired point of the canvas, internal log viewer, view and export of the output results. See the App settings and release notes.

Custom components and subcircuits are new in version 2.5. You can set their SPICE definition, symbol or add a picture. New components will be available from the Web Components in the bottom bar.

Infinite scroller with fast buttons for setting parameter values is new from version 2.3. By tapping the name of the parameter you can set the parameter’s value also by a text dialog.

The time scale can be set manually in the Menu – Circuit Properties or using a horizontal pinch gesture on the Plot window in the Continuous mode of simulation.

is a set of tools used for building electronic circuits, SPICE simulation, and calculation of circuits. These tools are complemented by the information center containing resources, connector pinouts and short interactive book explaining basic electrical theorems, laws and circuits.


Electrical Circuits – How Many Should You Have?

Minimum

The minimum number of electrical circuits  for a new home would be 4/5, as follows;

Lights

General Power outlets (GPOs)

Hob and Oven

Air Conditioning

Hot Water Service (Only if Electric)

Suggested Circuits

A good procedure is to have separate circuits for rooms that have heavy loads as well as separate circuits for major items.

This gives the following circuits for a 3/4bedroom house

GPOs Kitchen

GPOs Laundry

GPOs Living*

GPOs Bedrooms*

Lighting Living*

Lighting Bedrooms*

Hot Water Service**

Oven

HotPlates**

Centralised Air Conditioning

Phase Power

If you want Reverse Cycle Air Conditioning for a large house or want Instantaneous Hot Water you will need 3 Phase Power. In this case it may be worth spreading the GPO and lighting circuits over the different phases.


New Electrical Circuits

Just because you have sufficient power for your home now is no guarantee that it is going to accommodate any additional demands that you place upon it. While many homeowners are under the impression that just adding circuits to the breaker box will handle any additional demands, this isn’t always the case.

Most homes are outfitted with an electrical panel that is suited to its electrical requirements, with a little room for increased electricity. Adding a circuit or two might be just fine to accommodate your new electrical needs, but it’s quite easy to exceed the safe threshold if you’re not careful.

When do you need to look into adding circuits or updating your electrical panel?

Any time you add an appliance to your home, you are increasing the demand on the electrical system. Consult with a licensed electrician before hooking up a major appliance to determine if your system is ready for the added load.

Whenever you set up a big holiday light display, this is one of the leading causes for needing upgraded circuits.

Hot tubs draw a lot of electricity and are almost always a time for installing new circuits and potentially upgrading your electrical panel.

If adding a new room to your house or other additional square footage is added, this will need to be accommodated by adding one or more new circuits to the system. Depending on the size and electrical requirements of your addition, the increase in amperage could require updating the electric panel as the only viable option.

If you’re unsure about the best course of action, consult with the professionals. We’re always happy to talk with you about all of your options over the phone. We’re happy to schedule an appointment at your property to provide a free estimate too, and to give you an in depth consultation in order to pick the very best course of action for your situation.


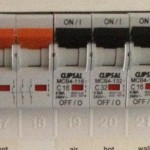
New smart Load Center brings app control to your circuit breakers

has announced a new version of its Load Center breaker box for homes, and it’s adding an integrated Wi-Fi or Ethernet hub that will let you manage your home electrical setup directly from your phone. That’s right: smart circuit breakers are here

There have been after-market products that can monitor energy use in your home before, but system goes a step further by integrating smart technology directly into the breaker box and individual circuit breakers, giving homeowners far more information on the power management in their homes.

The smart Load Center works with existing app for Android and iOS, and it gives ridiculously granular data on energy use in your home, letting homeowners track power consumption on a per-appliance or branch circuit basis, get alerts when circuit breakers trip and why they did, or even remotely shut off a circuit breaker from the app. In addition to the Load Center, will also offer smart circuit breakers to go with it, which will use the integrated hub to stay updated with the latest firmware. (It’s a mildly concerning phrase to see in the same context as “circuit breakers that control your home electricity.”)

There’s no word on price or release date, but it’s probable that this will be limited to professional electricians and developers to buy and install in houses they’re building, considering the sheer complexity of installing something like this. (It’s not the sort of hardware that you’ll use on your own for a weekend project.)

If you are building a home from scratch, however, it’s a pretty cool idea. Just remember to label all your circuit breaker switches right the first time around

Continue Reading

What Is An Electrical Upgrades

Reasons You May Need to Update Electrical Wiring in an Old Home

Did you know that electrical problems were the cause of 6.3% of all residential fires? Your home is especially at risk if you live in an older house with old electrical wiring. If you’re hesitant to update electrical wiring in your home, here are 5 reasons why you may reconsider that decision.

For houses with outdated wiring, the risk is especially high. If you own an older home, aging and dangerous electrical systems could be lurking behind your walls and putting your family at risk. You may be hesitant to update electrical wiring in your home, unsure if it is worth the cost or hassle. If so, here are five reasons why you should consider replacing and repairing your wiring.

Keep on reading to learn more!

Improve Your Safety

If you live in an older home, your outlets may only have two prongs instead of three. Most modern appliances have the third prong, which can pose a problem for homeowners. Two-prong outlets, which can’t provide enough power, can cause fuses to blow. Many devices or appliances plugged in simultaneously can increase the risk of blowing. This is true for energy-intensive fixtures like refrigerators because fuses can easily overload. Old-fashioned outlets are especially prone to power surges. The third prong of modern plugs serves as a connection to the ground wire in your home electrical system. This grounding conductor protects homes from surges of power.

Give Yourself More Power

Victorian homes have minimal outlets, designed for a few electric lights to replace the oil lamps and candles of old. An old home that has never had an electrical renovation uses way more power today than it was designed for. They are incapable of accommodating the needs of today. Homes from this period service 100-150 amps of electricity. A modern family’s energy consumption typically needs 200 amps of electrical service to meet their needs. Upgrading your electrical capacity to 200 amps will allow you to run a high number of appliances without the risk of overloading. You’ll be more prepared for future product innovations and capable of powering them.

Decrease Your Fire Risk

Electrical malfunctions in homes account for 51,000 fires each year. These fires result in an estimated 500 deaths and 1,400 injuries. Property damages from home electrical fires cost a staggering 1.3 billion dollars. Faulty outlets with only two prongs can be overloaded, causing sparks to erupt from blown fuses. Loose wiring in switches is also often the source of electrical sparks. Knob-and-tube wiring can come loose and electrify the wood, making surges that can cause wooden structures of the home to catch fire as well.

Houses built before the advent of modern appliances are especially prone to fire risk. They are not wired for high-powered electronics such as televisions or computers. The demands of multiple items plugged in at once can easily overwhelm their wiring, causing blown fuses and potential sparks.

Even homes built as recently as 25 years ago may need upgrades to reduce the risk of electrical fire. Be wary if you use extension cords or power strips to expand available outlets. You may be taxing your electrical system beyond its original design.

If you supplement your heating system with space heaters in winter, these heaters can increase your fire risk. Not only can they ignite nearby materials on their heating coils, but their heating elements also need a lot of electricity to heat them.

Protect Yourself From Surges

Power surges are one of the most potentially damaging risks to the electrical components in your home. Whether it be from lightning, downed power lines, or power station fluctuations, power surges can cause serious damage to devices in your home.

Computers can suffer memory loss, fried components, and even complete failure. Devices such as TVs and gaming systems are also extremely vulnerable to power spikes.

Modern electrical systems can include whole-house suppressors. These can protect your home from surges of 40,000 amps or more. Used with surge protectors, these upgrades can keep your electronics and appliances safe from power spikes.

Make Your Home More Convenient

Antique wiring was designed for utility, not convenience. If you own an old house, you might find yourself regularly frustrated with your lack of outlets.

An upgrade to your electrical wiring can include having additional outlets installed in your home. Modern, three prong outlets can be added to any room that needs more electrical access, such as your living room or even your garage. Spreading out your electric use between multiple plugs can also prevent the taxing of any one power source.

You may see a decrease in your homeowner’s insurance when you upgrade your electrical system. Many providers require that all electrical systems meet building codes. If your home still has knob-and-tube wiring, you might find it hard to get an insurance policy at all.

Today’s home buyers are also looking for convenience in their potential purchases. Adding more outlets can add attractive benefits to your home if you’re looking to sell in the future. You may add significant value to your home by making sure it is up to code for future inspections.


How Can an Electrical Upgrade Increase the Resale Value of Your Home?

Considering postponing electricity upgrades at home as you plan to market it? Hold on! The sale of a house with dubious cables and electrical systems is a bad idea. What should you replace before selling and what can you leave to the buyers’ judgment?

ENTICING ELECTRICAL UPGRADES FOR YOUR HOME

These upgrades are vital to reduce the need for endless price negotiations after the home inspection and help get a better price or higher offer in today’s tight housing market. Ask our electrician in OKC to know where you can upgrade your electrical system.

UPDATING WIRING SYSTEM

Tube and knob wiring, are a significant reason for domestic fires that were installed ages back and a pain for both homeowners and buyers. The entire home should have modern strong copper wires and sufficient grounding for safety and for managing the massive electronic load of today’s homes.

UPGRADING OLD ELECTRICAL SERVICE

Your home should be wired for 200 amps, not traditional 60-amp older homes that do not support today’s homes with the sheer number of electric appliances and electricity use.

GROUNDED OUTLETS

There is nothing like dusty two-prong outlets that says it won’t satisfy today’s high-tech buyers. It is the digital age, and today’s home buyers want plugs and wiring, on which they can depend. It must be possible for all outlets to accept properly grounded 3-pronged plugs. It may not matter if the old TV is surged, but buyers are concerned about their sensitive and costly smart gadgetry.


Reasons Why You Should Upgrade Your Home’s Electrical System

Keeping an old wiring system or having insufficient amperage can pose danger to your home. Here are some indications it is time to upgrade your electrical system:

You Live In An Old House

Older homes may be charming and unique, but they are often full of electrical issues because just a few decades ago, families did not have the entertainment centers, extra appliances and all the electronic items we have today which translates to higher electrical loads. When you lose power whenever you run your microwave and coffee maker at the same time, this could be a sign that it is time to upgrade your electrical system.

Just adding new wiring may not work. Electricians say this can lead to what is known as spaghetti wiring, a mess of potentially dangerous wires behind your wall. While it is possible to salvage old wires that are still intact and just get rid of the frayed and aluminum wiring that was installed in the 1960s and 1970s, it is more cost effective and safer to rewire the entire property. Old wiring systems do not balance the electrical loads across the circuit as well as the new ones.

You Are Buying New Appliances

Having newer appliances at home that draw larger volumes of energy can exceed your property’s electrical service capacity. In the 1960s, building usually had 60 amp services but due to the growing power demands, the current minimum standard designated by the National Electrical Code for most residential properties is 100 amps. Many new houses are now installed with 200 amp services in anticipation of future electricity needs.

Insufficient electricity can strain appliance motors. Appliances can heat up and easily get damaged when appliance motors do not receive enough power. Running appliances with insufficient power can shorten their lifespan and this could become more expensive for you in the long run.

You Are Renovating Your Home

You may also need to upgrade your electrical system if you are upgrading your home. If you are turning your attic into a game room, remodeling your kitchen, or constructing an additional bedroom, these changes can likely lead to increased electrical use or require rewiring.


The Insurance Issues About Wiring

Some insurers refuse to cover or renew policies on residential properties with 60-amp electrical service, aluminum wiring or knob and tube wiring. Provincial safety codes don’t impose a legal requirement to upgrade or replace these services.

A 60-amp service or a service with knob and tube or aluminum wiring is not necessarily an issue if it is properly installed and maintained.


We started with the foundation work

We had all our panels updated and the downstairs bathroom rewired/updated, and the upstairs master bath rewired/updated. This is what we’re calling Phase 1! Whooot! Completed. It was not as traumatic as I thought. And: I can safely plug in a blow dryer. I know, the excitement. Calm down now Susan! We also upgraded to 300 amps, so as we make additions and changes throughout the years, we’ll have plenty of amps to work with.

Here’s my advice if you need to have electrical work on your old home done:

Find a really good electrician. Like really good. Make sure they have experience working on old homes and are licensed.

Make sure your electrician has experience working with plaster walls. When we interviewed electricians, one said they were going to cut horizontal channels in our plaster walls. Ummm, no. Uhhhh, the plaster walls will FALL DOWN if you cut horizontal. Moving on. I am AMAZED that we had not one hole in our walls from running new wire. That takes talent. NOT ONE HOLE.

Beware of alarmists. These are the people who make it seem like end of days if your house wasn’t built in the last 3 years. I’m so over these people and have found they have no idea what they are talking about 98% of the time. If someone says something to you that sounds off, research it. Ask a professional. That said, I’ve talked to professionals that are alarmists too. Beware. There should be a practical solution for most problems.

Ask your electrician how they will approach the project. This was super helpful during the interview process and helped us understand the work ethic and personality of the electrician, and helped the electrician ballpark how much time it would take to complete the job.

Continue Reading

Tips The Best To Learn About Electrical Wiring

Electrical Wiring Tips

When I think back on how I acquired most of my knowledge about electricity, I have to laugh. I did get some expert instruction from a wise older electrical engineer who happened to know many aspects of the National Electric Code by heart. He helped me re-wire the first house I owned. My brain was so receptive to getting this information that I absorbed everything he showed me. For example, once he showed me how to wire two 3 way switches that worked independently to power a stairwell light fixture, I instantly understood

As I took on other jobs, I started to read books on the subject and do trial and error experiments. Back 25 years ago, I didn’t have the respect I currently have for electricity. Luckily, I am still alive and my work has never caused a fire. But there have been some close calls

Top Tips

Perhaps the biggest tip I can offer is to plan for plenty of circuits. The cost of a 40 circuit panel vs. a 30 circuit panel is peanuts. Two hundred fifty feet of 12 / 2 cable with ground is peanuts. Anticipate what the load for a circuit might be and if in doubt, simply add another circuit to a room addition or house. Heck, add two more!

Consider using 12/2 wire as your minimum wire size. I did that in my own home after years of frustration working at other people’s homes. I could notice a voltage drop at some houses when I used my power tools. I quickly learned that I was at the end of a long stretch of 14 gauge wire. Fourteen gauge wire supports 15 amps or 1,800 watts. But 12 gauge wire is rated for 20 amps or 2,400 watts. That is a significant difference.

Plan for big tools in your garage or workshop. If you have a table saw, it should have its own circuit. Those motors can draw lots of juice on startup and when a thick board is being cut with a semi-dull blade!


What are the tips for electrical wiring

Electrical wiring is like the vein of your house. If your vein gets cut then you may die, likewise if wiring is not done properly then your whole house may get charged causing accidents. so before doing wiring Consult an expert electrician which can give best suggestion to you.

Home Electrical wiring can be a tricky business and requires a great deal of attention. It is an essential requirement for almost every household and commercial building. This industry has seen significant growth in the past few decades. The standards have improved both in the safety and aesthetic avenue of the segment. This growth is attributed to the enhanced awareness and increasing lifestyle expectations. The consumers have a clear view of their requirements and have the capability to communicate their needs in the right manner. Though there is a high demand in the sector, there are still instances of faulty wiring and electrical fires. It is mainly due to the usage of a low-quality product and underestimating the current flow. This calls for the need for identifying the ideal electrical companies in Brisbane as the partner to meet the growing demands.

The ideal thing to do would be buy some cable cover conduit. It arrives in various sizes and lengths and also colors. It’s flexible and is split the whole length of this conduit, that way you’ll be able to come out of it everywhere together with your wires and get diam. Conduit to cover cables which come out of the main/larger conduit. Then use matching zip ties to fasten it neatly set up.

Electrical wiring can be as simple as following these tips. Connecting cords, circuit connections, device connections, and electrical panel connections all require some type of wiring connection. This tutorial is loaded with electrical wiring tips to make the job simple and easy to accomplish.

Whether you’re a first-timer or an old pro who just needs a few refresher tips, having a hands-on lesson will make the job that much easier. Sometimes, having the right tools for the job is just as important as knowing how to do the task. These electrical wiring tips will make your electrical projects a snap!


Electrical Rough-in Tips

Which electrical box works best?

Either plastic or fiberglass boxes will do the job, and each is completely code compliant. Some electricians prefer fiberglass models because they’re tougher, but others prefer the plastic models because they’re cheaper. Whatever style you choose, pick box sizes that have a volume of at least 20 cu. in. Dimmer switches and other smart devices are common these days and take up more room in the box than the simple devices of the past. Plus, bigger boxes just make wiring easier, especially if they’re crammed full of wires and connectors. Boxes destined for exterior walls and ceilings must be equipped with a vapor barrier seal.

Special cable staples

Staples (and drilled holes) need to be at least 1-1/4 in. away from the edge of a framing member. In some cases, that means stacking wires on top of one another and using one staple to secure them. Most standard staples can handle two wires. Never install staples over multiple wires unless the staple is approved for it. The staple package should list how many wires it’s rated for. The staple shown here is good for up to four wires.

Auger nits and angle drills work best

A 3/4-in. spade bit will work OK for drilling the holes, but auger bits drill faster and require less effort. Choose a bit like this Milwaukee ship auger bit that will chew through nails. It’s easier to drill straight holes through the studs with a right-angle drill. You can rent right-angle drills by the day, or you could buy an angle attachment for your own drill.

Install plates before pulling wire

Electrical cables need to be set back 1-1/4 in. or more from the edge of a stud or wood-framing member to protect cables from wayward nails and screws. Install steel cable-protection plates over holes drilled closer to the edge. Keep several plates in your pouch while you’re drilling and install them right away so you don’t forget.

Drill straight, aligned holes

Keep the holes straight and at the same height. Pulling cable through several consecutive holes drilled at different angles or heights is difficult because the cable will snag on the sharp edges and fight you the whole time! Straight, aligned holes make pulling cable a breeze.


Why you should know the basics of your house wiring

for a homeowner, it is important that you should at least know the basics of house wiring to avoid any challenges in future especially if you are not an electrical contractor. When your electrician is doing electrical installations as part of the remodelling project of your house, you should have some amount of knowledge about the house wiring basics by simply noticing the processes. The parts of electrical wiring fittings that are located in your house are-receptacles, switches, light outlets, appliances etc. We shall briefly explain them

Main Service Panel

This is a basic house wiring point responsible for the distribution of power to all circuits present in the house. This electrical wiring at home is the central distribution point and each circuit has a fuse or which is called circuit breaker.

Electric Meter

This is a basic electrical wiring point to indicate how much power is used in a household. The standard unit of measurement in the electricity meter is the KW hour. This amounts equal to the energy used by a load of one kilowatt over a period of one hour.

Service Head

This type of house wiring is also called the weather head/weather cap. This is the entry point of aerial electrical wiring installation into your home. This is a pivotal point where all the wires will enter the home at an angle of 45 degrees. It looks like a hood, waterproof in nature. These wires are powerful and carry a standard amount of 240-volt service to your home. They contain two wires with 120-volt current and one grounded neutral wire.

Electrical Boxes as a part of house wiring

They are a basic part of the house wiring structure where the endpoint where the wires are connected and provides power either as a switch or an outlet. This type of electrical wiring is an essential requirement for mounting devices, for example, switch, receptacle and light fixtures. The outlets are mostly used, while a ground fault circuit interrupter or GFCIs are needed in some places of your house. They are usually contained in either a plastic or a metal electrical box as per standard recommendations.


proper steps to follow when wiring your house

Design a writing diagram

Design a wiring diagram which shows the location of the breaker box and the path of the wires to each outlet

Install conduits

Start by running the longest wires first to avoid wastage conduits in walls even if you don’t anticipate using them right away. Start each wire upstairs and pull it through to the basement. This way, you do not use a ladder to push the wire up between floors. You should also leave at least one foot of extra wire at each end just in case you need to move things around later.

Know outlet count

Determine how many outlets and switches will run on one circuit. Normally, six outlets per a 110-voltage circuit is advisable in a living area, while as few as two per circuit are the standard in a kitchen, where appliances use more wattage.

Drill wire holes

Before drilling any holes, make sure you know what is on the other side of the wall/floor to avoid drilling through any electrical wires, ductwork, or water pipes. Proceed by drilling holes with a 1-inch bit in the middle of the studs where your wires will travel. The more outlets you have, the safer your home.

Set a breaker

Set your breaker box where you can easily access it in the future. A location in a basement or a utility room is desirable.

Continue Reading

Make Sure Doing Electrical Upgrades For Your Safety

Tips And Tricks For Upgrading Your Home Electrical System

The electricity requirements of electrical devices and appliances have changed considerably over the period of time. However, it is a fact that the electrical infrastructures of most of the homes have not been upgraded yet to meet this increasing demand. This has resulted in an increase in electrical load that later leads of safety issues in homes. Under such situation, it is imperative for the homeowners to make special arrangements in this regard. Seeking professional’s help is mandatory so that the certified profession can assess your home and determine if the home’s electrical system meets your family needs or not.

The amount of electricity a home needs is measured in amperes usually called amps. An ampere is a total amount of energy that flows through an appliance at a specific given time. According to a research, it was found that in past only 60 amp electrical services were required by the home owners to perform their daily chores. This has increased to hundred amps over the period of ten years. This is because of the new electrical appliances and devices being introduced in the market. When the home owners overburden their circuits, there is a high possibility of tripping a circuit breaker, overheating the wires in the walls and blowing a fuse.


ELECTRICAL UPGRADES YOU’LL WANT FOR YOUR HOME

Rewiring & Rerouting

Most room renovations include moving things around. For instance, you may re-conceptualize your entire kitchen and want the counter transferred to the other side of the room. While this may be a more aesthetically pleasing approach, your current electrical system may not be in a position to accommodate the move. Before you know it, you have to pull the counters back off the wall and make the adjustment. So make sure that there are actually wires behind the wall before you move your kitchen components, appliances, or electronics.

Modern Light Switch Features

When it comes to creating the right room atmosphere, lighting is everything. The right light can create energy or give you a soothing environment. Although the right type of light is important, light switches control them. So be sure you install a modern switch that makes controlling the lights easy. For instance, dimmer switches are very popular they allow just the right amount of light. There are many other options including 3-way, 4-way, sliders, different size switches, multi-locations, dimmers, and even remote control lighting. With all the options available, you never have to settle for boring light switches again!

Outlet and Receptacle Considerations

Receptacles and are like any other part of your electrical system. When installed, they must be safe and efficient. You may love the way a certain receptacle looks on your wall. The real question, however, is will it perform the way it’s supposed to. You’ve noticed that high-energy appliances use different receptacles, such as a specialized model for your washer or dryer. The reason for this is that these appliances require large amounts of power and need a certain type of receptacle that can accommodate it. When remodeling, get advice from a professional electrician in order to get the right outlets and light switches for the electronics and appliances in your room. There are several options and many of them come with great decorative features that put the finishing touches on your room.

Panel Upgrades

Today’s modern technology requires much more power than the older models. Although many manufacturers boast of energy efficiency, by comparison, they still utilize more energy. This is because of larger and more feature-packed washers and dryers, refrigerators, microwaves, dishwashers, and media-driven electronics and gadgets. Overall, the average household is using 30%-50% more energy than ever before. When remodeling any room in your home, consider how much energy it will utilize and whether or not your electrical system can handle it in a manner that is safe and efficient.


Powerful Electrical Upgrades

Electrical Upgrades for Your Circuit Breaker

Electrical wiring is not a job for most homeowners to tackle themselves, but it is a good idea to know a little about what will be required to bring your house up to speed when talking with your contractor.

One way to plan a new wiring project is to look in your main circuit breaker. Though some homeowners might be intimidated by their circuit breaker, most should easily be able to find the size of the service, and read the amp rating printed on it. In most cases, 100-amp service provides enough power to handle most loads. A service rated for 60-amps or less may need to be upgraded.

Look for open circuit breaker slots in the main circuit breaker panel. You will need one open slot for each 120-volt circuit that you may plan to install, and two slots for each 240-volt circuit. If your main circuit-breaker panel has no open breaker slots, you will need to have a sub panel installed.

Electrical Inspectors

Remember, all electrical wiring work requires review by your local electrical inspector to make sure the changes conform to local electrical and building codes. Failure to have proper permits and inspections can cause problems that can cost far more time and money than some homeowners (or unscrupulous contractors) may think they can save by doing work “under the table.” You could have trouble reselling your home in the future, or worse, your homeowners insurance could refuse to cover your loss in a house fire because the house was altered illegally!


What’s the Cost to Upgrade Your Electrical Service?

New Wiring: Open Your Walls (and Your Wallet)

To handle increased electrical loads, it’s likely you’ll also need to upgrade electrical wiring, especially if your house is more than 40 years old.

Upgrading your electrical wiring is a big job because the wires are located inside of walls, where they are difficult to get at without opening up walls. The price for a whole-house rewiring job–including opening up walls, running new wires, connecting switches, outlets and fixtures, and then repairing the mess–is $3,500 to $8,000 for an average-sized home.

For a larger home, or a house with restricted access to a crawlspace and exterior walls, the cost may reach $20,000 and more for labor and materials.

Not having enough power isn’t just an inconvenience — voltage drop-offs may actually damage sensitive electronics, so having plenty power is important to electrical home safety.

Even with enough power, you may need additional outlets to avoid relying on a tangle of power strips and extension cords — a potential safety hazard.

The Cost of Upgrading Electrical Service

The standard for household power used to be 60 amps. But modern homes may need as many as 200 amps to run air conditioners, computer equipment, high-definition televisions, and high-tech home automation devices.

The cost of upgrading your existing electrical service panel to a 100- or 200-amp panel is $800 to $3,000.


Home Electrical Upgrade Tips

If your home is 20 – 30 years old or more, there’s a good chance that your electrical system is being strained by the many new devices in use these days. It may be time to have a professional electrician take a look and see if an upgrade is needed.

Should an upgrade of your electrical system be advised, here are some tips to keep in mind.

Electrical re-wiring is not a job for most homeowners to tackle themselves. It’s a good idea, however, to know a little about what is needed before talking with your contractor.

A large electrical wiring project adds a considerable load to your main electrical service. In about 25 percent of all homes, some type of service upgrade is needed before new wiring can be installed. Some homeowners will need to replace an older 60-amp electrical service with a new service rated for 100 amps or more. A licensed electrician is needed for a job like this.

One way to plan a new wiring project is to look at your main circuit breaker. Though some people might be intimidated by their circuit breaker, most should be able to find the size of the service, and read the “amp rating” printed on it. A service rated for 60-amps or less may need to be upgraded. Normally, a 100-amp service provides enough power to handle most loads.

Look for open circuit breaker slots in the main circuit breaker panel. You will need one open slot for each 120-volt circuit that you may plan to install, and two slots for each 240-volt circuit. If your main circuit-breaker panel has no open breaker slots, you will need to have a sub panel installed.

Continue Reading

Outdoor Electrical Lighting Make Your Garden Beautifull In The Night

DIY Outdoor Lighting Tips for Beginners

Run Wire Under Walkways

If you need to run wiring under an existing walkway, try this trick: Dig a small trench on both sides. Next, flatten the end of a piece of rigid metal conduit and use a sledgehammer to drive the conduit, flattened end first, horizontally under the walkway. Then cut off the ends of the conduit with a hacksaw, file off the sharp edges and feed your wire through the conduit. A 10-ft. stick of rigid steel conduit (the thick, heavy-duty stuff) is inexpensive and available at home centers.

Buy the Right Transformer

A ‘low-voltage’ lighting system starts with a transformer plugged into a GFCI-protected receptacle. The transformer’s job is to convert 120-volt household current to 12 volts before sending it through special outdoor cable to light your fixtures. Just a few years ago, you would have needed a 600- to 1,200-watt transformer to light a yard full of halogen lamps. But because LEDs use fewer watts than their halogen predecessors, smaller transformers—45 to 300 watts—are usually all that’s needed.

You Can Keep Your Old Transformer

Any older low-voltage transformer can be used to power both halogen and LED lights—even if they’re mixed on the same circuit—as long as you have enough wattage to spare in your old transformer. If your transformer isn’t big enough to handle the additional load, add a second transformer or upsize your existing one.

Experiment with Clamp Lights

Before you buy anything, make a sketch of your deck or patio on graph paper (or use a program like Sketch-Up) and plan the location for each of your new light fixtures. To get an idea of the effect a fixture will give, pick up a clamp light—the kind with a metal reflector shade—and a few different types of lightbulbs with different brightnesses. Then, when it starts to get dark, try out the clamp light using different bulbs in a few different spots so you can observe their effect. Mark the most desirable locations on your drawing, and pay particular attention to lighting areas like stairs and transitions to different levels for safety.

Skip the Quick Connectors

Some landscape lighting kits have preinstalled quick connectors, but they aren’t what the pros use. Cheap connectors buried underground will work for a while, but they can corrode over time and fail. Cut off the factory-installed connectors and make splice connections using gelfilled wire connectors made specifically for outdoor use.


Tips for Safe Outdoor Lighting

Attach Holiday Lights With Non-Metal Non-Binding Materials

Be careful when you’re attaching temporary lighting strings and ornaments. Don’t use something that might damage the wires, and avoid anything with metal in it. Metal conducts electricity. Plastic cable ties are one popular and inexpensive choice for this task.

Install a Cover for Wet Locations in the Open

If your outdoor receptacle isn’t under a roof or some other protective cover it needs to have a special cover, known as an “in-use” cover, over it. As the name implies, these covers will keep the receptacle​ and the plug that’s in it, dry — even in the rain.

Install a Cover for Damp Locations Under a Roof

If you have an outdoor receptacle that’s on your porch or your screened-in patio or in some other location that’s protected from direct protection, then you can cover it with a “trap door” cover that will close, and keep it protected, when nothing is plugged into it — and it’s OK, then, to plug something into that receptacle and leave it there for a few days. These covers will be marked “Suitable For Damp Locations.”

Install GFCI Protection

GFCI, or Ground Fault Circuit Interrupter, protection is one of the most important electrical safety improvements of the last forty years. GFCI outlets should be installed in kitchens, bathrooms, garages, and even attics, crawl spaces, and unfinished basements. It’s required anywhere you might be plugging something in while you’re grounded. And that certainly includes when you’re standing out in the yard.

Install Weather-Resistant Receptacles

You should always plug temporary outdoor loads into outdoor receptacles, rather than running a cord out through a doorway or window from one of the receptacles inside your house, and those receptacles need to be weather-resistant. Even though they’ll have special outdoor covers over them, the receptacles themselves need to be able to take dampness, freezing, and heat without being damaged. They need to be rated as weather-resistant.


Outdoor lighting: A beginner’s guide

Start with task lighting

Once you’ve figured out your goals for outdoor lighting, task lighting should take priority. “For task lighting, it is important to illuminate pathways and entrances,” says Garcia.

“If your fixture is exposed to the elements, you will want to make sure to get a wet-rated fixture,” she says. “In many instances, a damp-rated light will work with a fully covered porch.”

Just make sure to stick to lighting that’s specifically identified as outdoor lighting—even if you are tempted by a cute indoor sconce.

Bright lights that wash a house or columns not only add drama, but also security, as outdoor lighting can be an enormous deterrent for would-be burglars, Wong explains.

There are loads of options that help boost security, from Wi-Fi-controlled LED light bulbs that can be controlled remotely to motion-sensor lights with distance and size controls.

It’s also important to bear in mind that lighting for security is all about location, primarily the front door, driveway, and garage. “If you are using spot lights/motion sensors, it’s best to position them in a location that does not bother you in the house or your neighbors,” Garcia says. “Install them during the day and adjust them at night to make sure they are not a burden on you or your neighbors.”


tips for effective outdoor lighting

  • Transformers and outdoor circuits. Choosing a starting point for your circuit is an important consideration when creating your plan. The further away a light is from a transformer (and the more lights in between), the dimmer it will be. Don’t overload a circuit with lights, try to keep it to a maximum of 100 watts on each line. Your transformer should be more than adequate to match your needs. Talk to your electrican first, but it’s better to buy one with more output than you need so you can add more later.
  • Less is more. Outdoor lighting is subtle art, used to illuminate paths, highlight trees and plants and for letting you know where a building is. It’s no use lighting up your backyard like a sports game. Use the right lights for the right job; there’s a different outdoor light for almost any feature you care to light up. Use underwater lights for ponds and fountains, small path lights for paths and tree-mounted spotlights (not too bright) for that hint of moonlight.
  • Be safe and aesthetically pleasing. Don’t simply run a lead from your lounge outside to a 4-way adapter and plug in four lamps. Outdoor lighting is designed just for that – outdoors. Electricity does not do well outdoors unless properly channelled, so make sure you’re wiring up your outdoor lighting by the book. Call on an electrician to help you out if need be.
  • Energy saving. Outside lights may seem like an extra expense reserved for the luxurious among us, but the cost can be minimal. Investigate different types of lighting.Solar power is a great resource for outdoor lighting. There are many cheap outdoor lamps with their own solar panels that charge during the day. This will cost you nothing but the initial cost of purchase. Of course, they will need to be placed in a sunny place. LED outdoor lighting uses much less energy than traditional light bulbs, plus they are more hardy, needing fewer replacements. Think about the layout of your garden and what areas require light and where shadows will fall. Making a plan of your garden will let you know exactly what’s needed to get the best out of your garden after-hours. Of course, the best way to save money is by not leaving your lights on all the time. You will only need outdoor lighting on the odd occasion, so keep it special and leave them off most of the time.
  • Long term considerations. Your outdoor lighting will need to handle all types of weather and seasons. When installing your lighting be sure you have a good idea of what changes your garden goes through, what plants will grow rapidly over the next few months, and what effect the lighting will have in each season. Your lighting becomes part of your garden, so treat it as such.


Must-Know Outdoor Lighting Tips

Include These Three Types.

Make sure to incorporate the three basic types of lighting: ambient, task, and accent. Ambient lighting can be achieved through hanging lights, post lights, and wall lights. Task lighting includes pathway lights, plus deck and security lights. And you can get accent outdoor lighting with landscape kits and spotlights. “For a small patio and a modest budget, consider string lights, solar spotlights, or LED candles,” Murphy says.

Calculate.

Before you start shopping, you’ll need to figure out exactly how much lighting you need. “To determine how much light a space requires, try this quick calculation: multiply the square footage of the area you want to light by 1.5 to get a rough estimate of the total wattage required,” he says. “For example, 100 square feet of space would require 150 watts.”

Plan Ahead When Choosing Fixtures.

Observe your space and take measurements so you don’t choose fixtures that are too large-scale. “Check the size and position of a fixture before you buy using a simple piece of paper,” Murphy says. “Use a paper template to determine exact placement to review the size before buying. For either the front porch or the back patio, the size of an outdoor wall light should be approximately one-third the height of the door.” You’ll also want to make sure you’re choosing sturdy lighting, one that’s made of high-quality and weather-resistant materials.

Use LEDs.

“They use far less energy than halogen or incandescent bulbs,” he says. “Plus, they are almost maintenance-free, so you won’t have to change bulbs.”

Take a Look From Inside Your Home.

This can help you decide on which lighting to choose and how place it around your yard. “Consider how patio spaces, gardens, and pathways look like from inside your home,” he says. “Lighting gardens or shrubbery that can be seen from living or dining rooms give a room-expanding view to the outside at night. Think path lighting for garden areas, or use solar outdoor lighting for a quick and easy style update.”

Continue Reading